Ask a new starter where the onboarding process lives and you will get an honest answer: "It depends what you mean." The checklist is in one tool. The guide that explains why each step matters is on a wiki page last edited by someone who left. The brand PDF is on a shared drive in a folder named after a person. The list of approved suppliers is in a spreadsheet, or possibly three. None of them agrees with the others, and nobody can say with confidence which version is current.
Process knowledge drifts because it is kept in five places. Each copy is edited by different people on different schedules, and the gaps between them are where mistakes live. A process is only as reliable as the place it lives, and when that place is five places, it is not reliable at all.
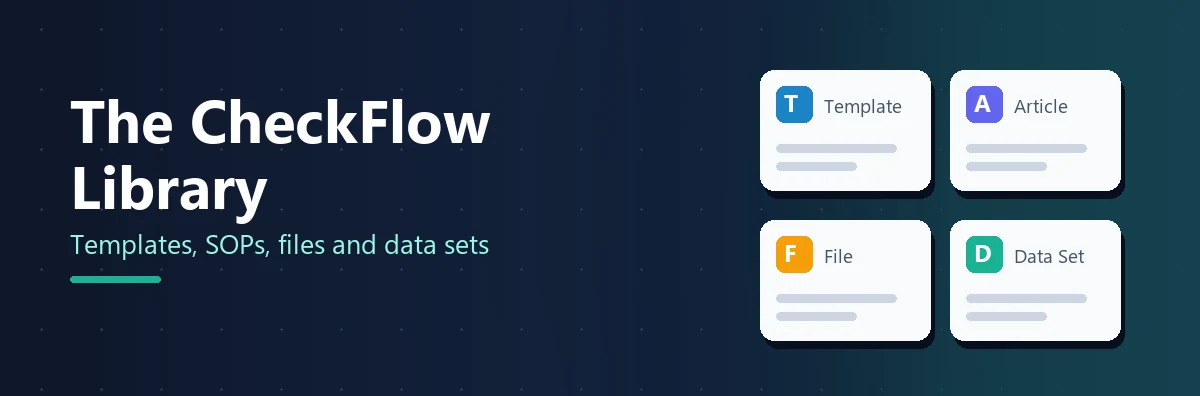
The CheckFlow Library is one place. It is the central repository for your team's templates, knowledge base articles, files and Data Sets: four kinds of item, one set of folders, one search box, one tag scheme and one permissions model. This guide walks through what goes in it, how folders and permissions work together, the version history that lets you edit templates safely, the analytics every template carries, the public example templates you can copy from, and six ways teams choose to organise it.
What the Library Is
Definition: The Library is the section of CheckFlow, reached from the main navigation, where your team's templates, articles, files and Data Sets are stored in folders you control. Administrators have full access. Members need a Library permission — Library.Creator, Library.Viewer or Library.FileUploader. Guests cannot access the Library at all.
The screen is split into two panels. The left-hand sidebar holds a search box that searches by name across every folder you have access to; the folder tree, grouped into a System section and a Team section; a list of tags in use, each a one-click filter; and a Create New section at the bottom with a button for each kind of item you are allowed to create. The right-hand panel lists the items in the selected folder, search results or tag filter. Each item shows a type badge, its name, metadata that depends on its type — the number of checklist runs, the last modified date, the upload date, or for a Data Set its field and record counts — its tags, and an expand arrow that opens more detail without leaving the list.
Two things are worth saying about the name. The Library is your team's own content, not a public gallery; the gallery is called Example Templates and is covered below. And the Library replaced two older screens — the Knowledge Base and template folders — so if you have been using CheckFlow for a while, your articles and folder structure are already here.
The Four Item Types
Templates
Templates are the blueprints for every process your team runs. Click New Template in the Create New section with a folder selected and you are taken to the Template Designer; when you save, the template lands in that folder. Each template item shows an Edit Template or View Template button depending on your permission on its folder, and an Actions menu for those with edit permission: Print Template, Duplicate Template, Generate Create & Run Link, Move to Folder, Remove From Library and Archive.
Expand a template and three tabs appear. Checklist Runs lists every checklist started from the template with its scheduled, started and completed times, current status, assigned team members, and tasks completed out of the total. Version History is covered in its own section below. Analytics shows how the template is performing across the team, and gets its own section too.
The Create & Run link deserves a mention. It generates a shareable link that, when clicked, creates a new checklist from the template and opens it immediately. Give it to the people who run a process regularly and they never need to find the template at all.
Articles
Articles are knowledge base entries: written guides, standard operating procedures and reference material, composed in a rich-text editor. Creating one needs the KnowledgeBase.Creator permission or an Administrator role. An article's primary button is Edit Article or View Article depending on your folder permission, and clicking the expand arrow shows a preview of the content inline so you can read it without opening the editor.
The reason articles live in the Library rather than in a separate wiki is the point of this whole feature. A checklist tells someone what to do. An article tells them why, what good looks like, and what to do when something unusual happens. When the two sit in the same folder under the same permissions, found by the same search, the process and its documentation are updated in one place by the same people.
Files
The Library accepts files of any type. Click Upload File with a folder selected, drag files onto the upload area or browse for them, optionally tag them, and upload; you can add several in one session. The Library assigns an icon by extension — PDF, Word, spreadsheet, presentation, image, video, audio, archive, text, code — and anyone with access to the folder sees a Download File button, whether their permission is Edit or View. Expanding a file item shows who uploaded it and when. Uploading needs the Library.FileUploader permission, and only Administrators and the person who uploaded a file can delete it.
Data Sets
A Data Set is a reusable table of reference data — clients, sites, products, suppliers — that feeds Dropdown, Multi-Choice, Sub-Tasks and Table controls in your templates and can pre-fill other fields when a record is picked. Data Sets are filed in folders and tagged like any other item, and follow the same permissions. Unlike the other three, a Data Set has no inline expand panel; clicking it opens its own page, and its Library row shows the field count, record count and last update. They are the subject of their own guide.
Folders
The folder tree has two sections. The System section is built in and cannot be edited, moved or deleted:
- Unfiled holds items that have not been placed in a folder. Anything created without a folder selected lands here, as does a Data Set created through the API and a template imported from Example Templates. Unfiled items are visible to everyone on the team who has a Library permission.
- Archived holds items that have been retired. It is visible to Administrators only, and it is where archived items are restored from.
- Example Templates is the link to CheckFlow's public gallery of pre-built templates.
The Team section holds the folders you create. Click New Folder, give it a name, optionally pick a parent folder, and save; you need to be an Administrator or hold Library.Creator. Folders nest to any depth, shown with indentation in the sidebar, so you can organise by department, then by client, then by process area if that is how your organisation thinks. Deleting a folder does not delete the items inside it; they move to Unfiled.
Folder permissions
Each folder has its own permission settings. Hover over the folder, click the pencil icon, open the Permissions tab, click Add, search for a team member or group, and choose one of three levels:
| Permission | What the user can do |
|---|---|
| Edit | View all items in the folder and make changes — add, edit, move and delete items |
| View | Browse and view items in the folder, and download files; cannot make any changes |
| Deny | Cannot see the folder or any of its contents |
Permissions can be granted to individual team members or to groups, and a group grant applies to everyone in the group. By default a new folder has no permissions set, so only Administrators can reach it until you grant access. Permissions are set once on the folder and apply to every template, article, file and Data Set inside it, which is what makes them manageable: give the finance team Edit on the Finance folder and they can maintain their own processes without touching anyone else's.
How Library and Folder Permissions Combine
A person's effective access to a folder is the more restrictive of two things: their Library permission, which decides what they can do in the Library at all, and their folder permission on that specific folder. Both must be satisfied. Three examples from the documentation make the rule concrete:
- Library.Viewer plus Edit on a folder: can view the folder but cannot make changes, because the Library permission caps what they can do overall.
- Library.Creator plus View on a folder: can see the folder but cannot add or edit items in it.
- Library.Creator plus Deny on a folder: cannot see the folder at all.
Two permissions that only enable a button. Template.Creator turns on the New Template button and KnowledgeBase.Creator turns on the New Article button — and neither grants any Library access on its own. A Member with Template.Creator and no Library permission cannot open the Library, so cannot see the button. Pair them with Library.Creator or Library.Viewer.
Here is the shape of the full matrix, trimmed to the rows that decide most questions:
| Action | Administrator | Library.Creator + Edit folder | Library.Creator + View folder | Library.Viewer |
|---|---|---|---|---|
| View items, download files, view template analytics and version history | ✓ | ✓ | ✓ | ✓ |
| Create, rename or delete a folder; manage folder permissions | ✓ | ✓ | — | — |
| Add, edit or duplicate a template; generate a Create & Run link | ✓ | ✓ | — | — |
| Create, edit or delete an article | ✓ | ✓ | — | — |
| Upload a file | ✓ | ✓ | — | — |
| Delete a file | ✓ | Own files only | — | — |
| Create or edit a Data Set; replace its records from CSV | ✓ | ✓ | — | — |
| Delete a Data Set | ✓ | — | — | — |
| Archive or restore a template; view the Archived folder | ✓ | — | — | — |
Moving an item between folders needs Edit on both the source and the destination. Deleting a Data Set is Administrator-only even for people who can edit it, because a Data Set can be feeding controls across many templates, and its removal deserves a higher bar than a change to its contents.
Tags and Search
Search runs across every folder you have access to, so you do not need to know where something was filed to find it, and it returns templates, articles, files and Data Sets alike. Type into the search box, press Enter or click Search, and click the cross to return to the folder view.
Tags narrow the list further. Add tags to any item and the sidebar lists every tag in use; click one to filter the item list to items carrying it. Because tags cut across folders, they are the right tool for a dimension that does not match your folder tree. If folders are by department, tag by client. If folders are by client, tag by compliance framework. A brand guidelines PDF, the client onboarding template and the client contacts Data Set can sit in three different folders and share a single client tag.
Version History and Rollback
Every save of a template creates a new version, and the Version History tab in a template's detail panel lists every one of them with the version number, who created it and when, and a View This Version button that opens that version read-only. That gives you two things.
The first is an answer to "what changed?". When a step goes missing from the onboarding template, you can open last month's version, compare it with today's, and see exactly what was removed and by whom. The second is a safety net. Editing a template never changes checklists that are already running — they keep the structure they started with — so you can improve a process while live runs carry on, and if an edit turns out to be a mistake, roll back to an earlier version without disrupting work in progress.
Why running checklists are protected: a checklist is one run of a template and holds a copy of every task and control plus the answers people gave. Changing the template does not reach back into that copy. A completed checklist is a record of what happened at the time, and editing the template must never rewrite history. See what a process is for the model behind this.
The Per-Template Analytics Tab
Every template in the Library carries an Analytics tab that shows how that one template is being used across the team — not only your own runs. By default it covers active runs; toggle Show Completed Runs to include the finished history. It holds:
- Active Runs, a donut chart breaking down the status of every current run of this template.
- All Tasks, a donut showing the combined completion status of every task across those runs.
- Task Status by Assigned User, a stacked bar per team member showing who is overloaded, overdue or on track.
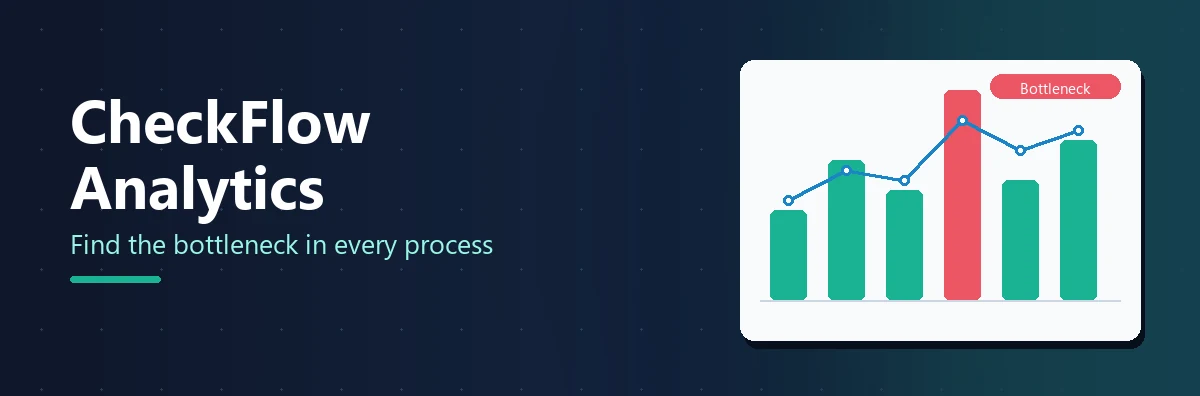
- Task Completion & Status, a stacked bar per task in the template, which is how you find the step that consistently causes delays or keeps being marked N/A.
- Four statistics: In Progress, Due Soon (checklists with a task due within the next three days), Overdue, and Avg. Completion Time across completed runs.
The team-wide Analytics dashboard is for comparing processes with each other. The template tab is for improving one process, and because it sits next to the template's own Edit button, the loop from "this step is always late" to "let's change this step" is very short.
Example Templates
The Example Templates link in the Library sidebar opens CheckFlow's public collection of pre-built process templates. It is available to anyone — you do not need to be logged in to browse it, and the same templates can be browsed on this site at checkflow.io/templates. Templates are displayed as cards with a name, a short description and a preview of the top-level tasks, filed under twenty-seven categories from Audit to Sales. Search by name or keyword, filter by category, and click a card for a full preview of every task and its content.
When you find one that fits, click Import Template. You need to be logged in as an Administrator or a Template.Creator; Guests cannot import. The template is copied into your team's Library, landing in Unfiled so you can move it to the right folder, and the copy is completely independent of the original: open it, click Edit Template, and add, remove or reword anything to fit your process without affecting the public version. The import also lets your whole team know a template has arrived, so nobody starts building the same thing from scratch.
That last point is the reason the gallery sits inside the Library. A new department that wants to start using checklists has never built one. The good examples exist, but if there is no obvious place to look, they start from a blank page and repeat the mistakes another team solved a year ago. Three that most teams end up importing:



Archive vs Remove From Library vs Delete
Three actions take an item out of a folder, and they are deliberately different because one of them cannot be undone.
| Action | What happens | Reversible? | Who can do it |
|---|---|---|---|
| Archive | Moves the item to the Archived system folder, hidden from everyone but Administrators. | Yes — an Administrator restores it from Archived and chooses the folder | Administrators only |
| Remove From Library | Takes the item out of its folder without deleting it. A template can still be reached from the Templates section and from Unfiled. | Yes — file it again | Edit permission on the folder |
| Delete | Permanently deletes the item. | No | Edit permission on the folder for articles; Administrators or the uploader for files; Administrators only for Data Sets |
A Library.Creator who archives cannot restore. Archiving an article or a file is allowed for anyone with Edit on the folder, but the Archived folder is visible to Administrators only, so the person who archived it cannot bring it back themselves. If that is not what you want, archive as an Administrator or be ready to ask one.
Six Ways Teams Organise a Library
There is no single right folder tree, and because nesting is unlimited and tags cut across folders, you can change your mind later. These six patterns cover most organisations.
By department
The default for a company of any size. One top-level folder per function, with permissions granted to that function's group, and nested folders for process areas inside it. Templates, the articles that explain them, the files they reference and the Data Sets they read from all sit together under the department that owns them.
Finance/
  Month-End Close/        (template, close procedure article, close calendar PDF)
  Accounts Payable/       (template, approved suppliers Data Set)
People/
  Onboarding/             (template, IT security policy article, welcome pack PDF)
  Offboarding/
IT/
  Change Management/      (template, environments Data Set, CAB minutes files)
By client
The natural shape for an MSP or an agency. One folder per client, holding that client's onboarding template, its site list Data Set, its contract files and the runbook articles specific to it. Grant the client's Guest users View on their folder and nothing else, and they can read their runbook without seeing anyone else's.
By site
For property, facilities, retail and manufacturing teams. One folder per site or region, with the inspection templates, the site plan PDFs and the equipment Data Set for that location. Tag by process type — fire safety, HVAC, opening and closing — to see the same process across every site.
By compliance framework
For teams whose processes exist because a standard requires them. A folder per framework — ISO 27001, SOC 2, HIPAA — holding the control checklists, the policy articles and the evidence files an auditor will ask for, so the audit pack is a folder rather than a scavenger hunt. Cross-tag by control owner.
By lifecycle
Some teams keep a Draft folder with Edit for process authors only, a Live folder with View for everyone and Edit for process owners, and rely on Archived for retired processes. Moving a template from Draft to Live is the publishing step, and the folder permissions enforce who may take it.
By product line
For manufacturers and product companies. One folder per product, holding the quality control templates, the specification files, the work instruction articles and a Data Set of components or SKUs. The product owner holds Edit; the line holds View.
Put Every Process in One Place
Import an example template, file the SOP beside it, and give the folder to the team that owns it. Free trial, no credit card required.
Start free trial See the Library FeaturesA Separate Wiki vs the Library
| Docs in a separate wiki | Docs in the CheckFlow Library |
|---|---|
| The SOP and the checklist it describes live in different tools | The article sits in the same folder as the template |
| Documentation drifts from the process as steps change | Template and article are updated in one place by the same people |
| Reference files are on a shared drive nobody can navigate | Files of any type are tagged, searchable and downloadable from the folder |
| Permissions are managed separately in every tool | One set of folder-level permissions covers templates, articles, files and Data Sets |
| Template edits leave no history and nothing to roll back to | Full version history on every template, and running checklists are never affected |
| New teams start from a blank page | Example Templates to copy from on day one |
The Library is included on the Business plan at $10 per user per month, or $9 on annual billing, along with every other feature — see pricing. For the full picture on documenting and running procedures together, see standard operating procedure software.
Templates, SOPs, Files and Data Sets. One Library.
If your team refers to it while running a process, it belongs in the Library. Start with the folders you already have in your head.
Start free trial Book a DemoFrequently Asked Questions
What can I store in the CheckFlow Library?
Four kinds of item. Templates are the blueprints your checklists run from, each with version history, a run history and an Analytics tab. Articles are rich-text knowledge base pages for guides, SOPs and reference material. Files can be any type — PDFs, spreadsheets, images, video, archives — tagged and downloadable by anyone with access to their folder. Data Sets are reusable reference tables that feed dropdowns and auto-fill fields in your checklists. All four live in the same folders, share the same tags and search, and follow the same folder-level permissions.
Who can see a folder in the Library?
Someone who has both a Library permission (Library.Creator, Library.Viewer or Library.FileUploader) and an Edit or View grant on that folder, either directly or through a group. Administrators see everything without needing folder grants. A new folder has no grants, so only Administrators can reach it until you add some. Search only returns items from folders you can access, and Unfiled items are visible to everyone with a Library permission.
Can I roll back a template to an earlier version?
Yes. Every save creates a version, and the Version History tab lists each one with who created it and when, plus a View This Version button that opens it read-only so you can see what changed. Restoring an earlier version never alters checklists that are already running — they keep the structure they started with — so you can correct a mistake without disrupting work in progress.
What is the difference between an Article and a Template?
A Template is something you run: a structured sequence of tasks and controls that becomes a checklist with assignees, due dates and captured answers. An Article is something you read: a rich-text page holding the guidance, standard operating procedure or reference material behind a process. Typically a folder holds both, so anyone doing the work can find the context beside the checklist. Creating templates needs Template.Creator; creating articles needs KnowledgeBase.Creator; both need a Library permission as well.
Where do the Example Templates come from, and can I publish my own?
Example Templates is a public collection curated and published by CheckFlow, browsable by anyone at checkflow.io/templates or from the Library sidebar. You can import any of them into your own Library as a fully independent copy. The gallery is not a marketplace: teams cannot publish their own templates to it. To share a template inside your organisation, file it in a folder the right people can see, or use Duplicate Template to give another team their own copy.
Do Data Sets live in the Library too?
Yes. A Data Set is created from the Library's Create New section, filed in a folder and tagged like any other item, and its folder permissions decide who can browse and who can edit it. Deleting a Data Set is Administrator-only because it may be feeding controls in many templates. Built-in System Data Sets such as Countries and Currencies are the exception: they are offered only in the Template Designer and do not appear in the Library.